![[บทช่วยสอน] Stable Diffusion Nudify (จากเสื้อผ้าสู่เปลือย)](https://image.betterwaifu.com/vjlCkQn_r7Jp3J1Ci2vakKK_23FCWMDrmMwHg9uE328/resize:fit:3840:0/sharpen:0.5/plain/s3://betterwaifu/blog/2601f5a6-acb7-4873-9b00-9187f02e8994/featured.png@webp)
[บทช่วยสอน] Stable Diffusion Nudify (จากเสื้อผ้าสู่เปลือย)
g
By gerogero
Updated: March 13, 2026
คุณควรติดตั้งและอัปเดต Automatic1111 แล้ว ตรวจสอบ คู่มือสำหรับผู้เริ่มต้น หากยังไม่ได้ติดตั้ง
คุณจะต้องใช้โมเดลต่อไปนี้เพื่อทำตาม:
- sd-v1-5-inpainting.ckpt – https://huggingface.co/runwayml/stable-diffusion-inpainting
- f222.ckpt – https://rentry.co/sdmodels#zeipher-f222-female-nude-better-anatomy
นี่คือคู่มืออย่างรวดเร็วเกี่ยวกับการทำงาน เราสามารถสร้างส่วนใหม่ของภาพที่ไม่เคยมีมาก่อน: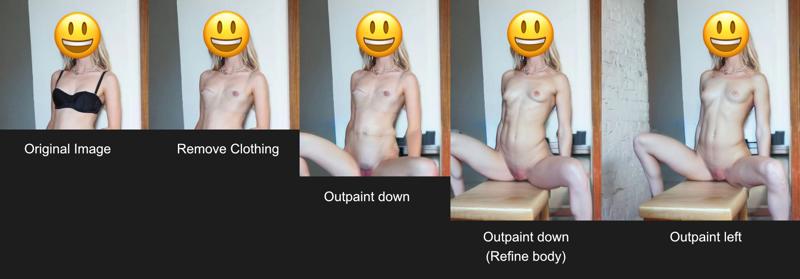
ทั้งหมดนี้ใช้เวลาสักหน่อยและต้องใช้ความอดทน แต่ผลลัพธ์นั้นคุ้มค่าอย่างแน่นอน ตัวอย่างนี้เป็นงานที่ทำอย่างเร่งรีบเพื่อให้ฉันมีบางอย่างในการอ้างอิง และมันยังดูดีอยู่! เวลามากกว่านี้สามารถใช้ในการปรับแต่งได้ แต่ฉันคิดว่ามันเพียงพอที่จะสื่อสารข้อความได้ ส่วนที่ดีที่สุดคือ วิธีนี้ใช้ได้กับผู้ที่แต่งตัวเต็มที่ ดังนั้นคุณไม่จำเป็นต้องมีภาพของพวกเขาในชุดบิกินี อะไรก็ได้ก็ใช้ได้
นี่คือขั้นตอนพื้นฐานที่ฉันใช้เพื่อให้ได้ผลลัพธ์แบบนี้:
- ก่อนทำอะไร ให้แน่ใจว่าไปที่การตั้งค่าและตรวจสอบ “ใช้การแก้ไขสีในผลลัพธ์ img2img เพื่อให้ตรงกับสีต้นฉบับ” นอกจากนี้ยังตรวจสอบ “บันทึกสำเนาภาพก่อนที่จะใช้การแก้ไขสีในผลลัพธ์ img2img” สิ่งนี้อาจมีประโยชน์ เนื่องจากบางครั้งภาพนู้ดดูดีในตัวอย่าง จนกว่าจะเสร็จสิ้นและแก้ไขสีกลับไปเป็นสีของเสื้อผ้าที่เคยมีอยู่ หากเกิดเหตุการณ์นี้ ให้ไปที่โฟลเดอร์ภาพของคุณและใช้เวอร์ชันที่ไม่ได้แก้ไขสี
- อีกสิ่งสำคัญที่ต้องทราบคือ คุณอาจต้องการหลีกเลี่ยงการใช้ภาพขนาดใหญ่ ฉันพบว่าการปฏิบัติที่ดีที่สุดคือการเปิดภาพบนจอภาพของคุณและใช้เครื่องมือ Snipping เพื่อจับภาพหน้าจอ จากนั้นคุณสามารถตรวจสอบ “Inpaint at full resolution” และทุกอย่างจะทำงานได้ดี การใช้ภาพที่มีความละเอียดสูงอาจนำไปสู่ผลลัพธ์ที่ไม่คาดคิด แต่บางครั้งมันก็ใช้ได้เช่นกัน ดังนั้นทำอะไรก็ได้ที่คุณต้องการ
- เริ่มต้นด้วยsd-v1-5-inpainting.ckpt และปิดบังเสื้อผ้าที่มองเห็นได้ของใครบางคน เพิ่ม prompt เช่น “ผู้หญิงเปลือย” บางครั้งการตั้งค่า negative prompts ก็มีประโยชน์ ฉันใช้ “เสื้อผ้า, เสื้อผ้า, ผ้า” ตั้งค่าเป็น fill วิธีการสุ่ม=Euler, ขั้นตอน=80 (บางครั้ง 80 อาจสูงเกินไป ดังนั้นคุณสามารถลอง 40 ได้เช่นกัน), CFG=7, Denoising=0.75
- เปลี่ยนไปที่f222.cpkt ปิดบังร่างกายทั้งหมด ตั้งค่าเป็นต้นฉบับ วิธีการสุ่ม=Euler, ขั้นตอน=80, CFG=7, Denoising=0.3 (ลดลงเพื่อให้ใกล้เคียงกับสิ่งที่มีอยู่แล้ว เพิ่มขึ้นเพื่อสร้างเวอร์ชันที่ดีกว่าเล็กน้อย แค่ไม่ต้องสูงเกินไปหรือคุณจะได้สิ่งที่แตกต่างออกไปทั้งหมด)
- สำหรับการสร้างภาพนอก (การสร้างส่วนของภาพที่ไม่มีอยู่) เปลี่ยนกลับไปที่sd-v1-5-inpainting.ckpt คุณสามารถลอง Fill หรือ Original สำหรับสิ่งนี้ แต่โดยปกติ Original จะทำงานได้ดีที่สุด วิธีการสุ่ม=Euler a, ขั้นตอน=80, CFG=7, denoising=0.8 การปฏิบัติที่ดีที่สุดคือการสร้างภาพนอกในทิศทางเดียวในครั้งเดียว สำหรับ prompt คุณไม่จำเป็นต้องรวมมากเกินไป คุณอาจใช้ “ผู้หญิงเปลือยยืน” แต่บางครั้งอย่าง “ผู้หญิงเปลือยนั่ง” หรือ “ผู้หญิงเปลือยนั่งยอง” ก็ได้ผล มันไม่จำเป็นเสมอไป แต่คุณอาจรวมองค์ประกอบพื้นหลังบางอย่าง สำหรับตัวอย่างนี้ฉันเพียงแค่ใส่ “ผู้หญิงเปลือยนั่งยอง ขาแยก อ้าขา”
- เมื่อคุณได้ภาพนอกที่คุณพอใจแล้ว ให้ใช้sd-v1-5-inpainting.ckpt ด้วยการตั้งค่าเดียวกันกับก่อนหน้านี้เพื่อลบหรือแก้ไขสิ่งที่คุณไม่ชอบ จากนั้นเปลี่ยนไปที่f222.cpkt เพื่อทำความสะอาดร่างกายให้ดียิ่งขึ้นและทำให้มันกลมกลืนกับส่วนที่เหลือ
- ทำซ้ำทุกขั้นตอนจนกว่าจะเสร็จ!
ฉันหวังว่าข้อมูลนี้จะเป็นประโยชน์กับบางคน แน่นอนว่ามีหลายวิธีที่สามารถใช้เพื่อจัดการกับปัญหา ด้วยการใช้ Photoshop คุณยังสามารถปรับเปลี่ยนท่าทางของบุคคลได้อย่างหยาบๆ นำเข้ากลับมา และทำซ้ำขั้นตอนเดียวกันหลายครั้ง นอกจากนี้ยังมีตัวเลือกในการปิดบังใบหน้าของใครบางคนโดยใช้หน้ากากและจากนั้นทำให้ส่วนที่เหลือของภาพเสร็จสมบูรณ์ มีตัวเลือกมากมาย สนุกกับมัน!
วิธีที่ 2
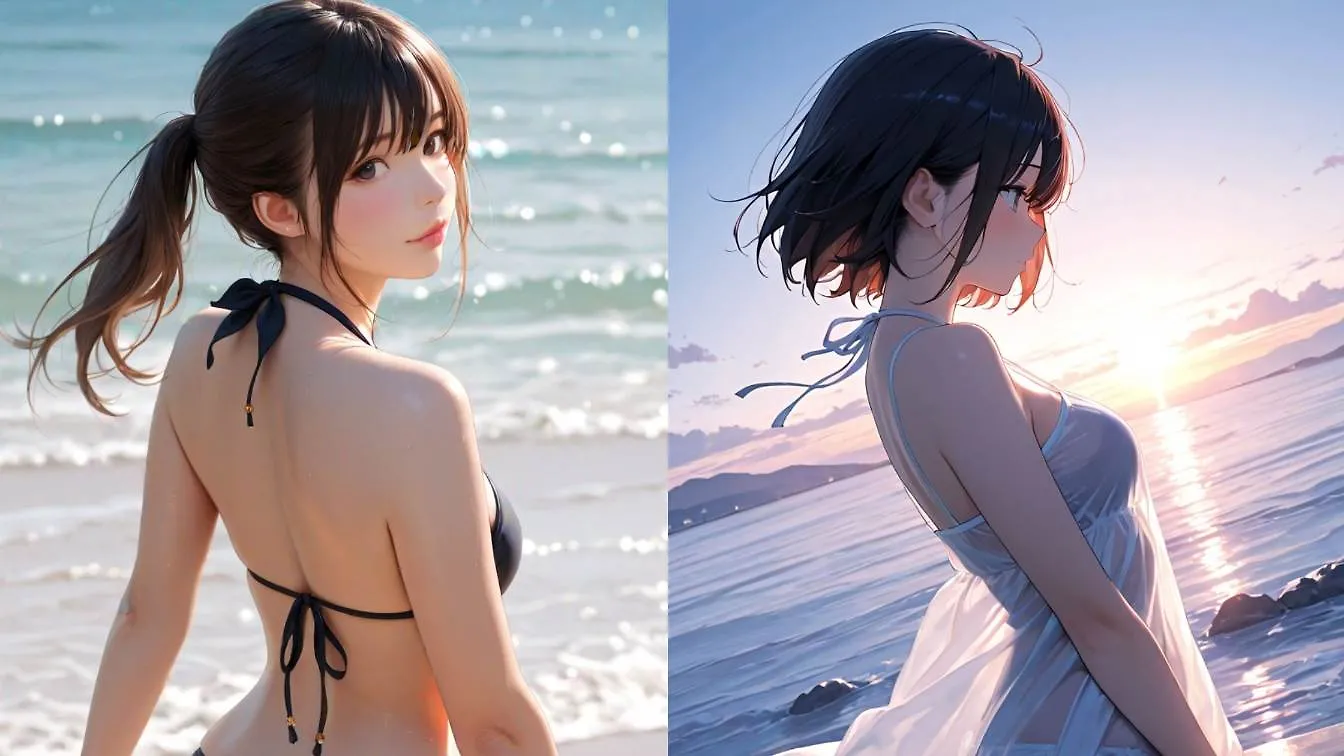
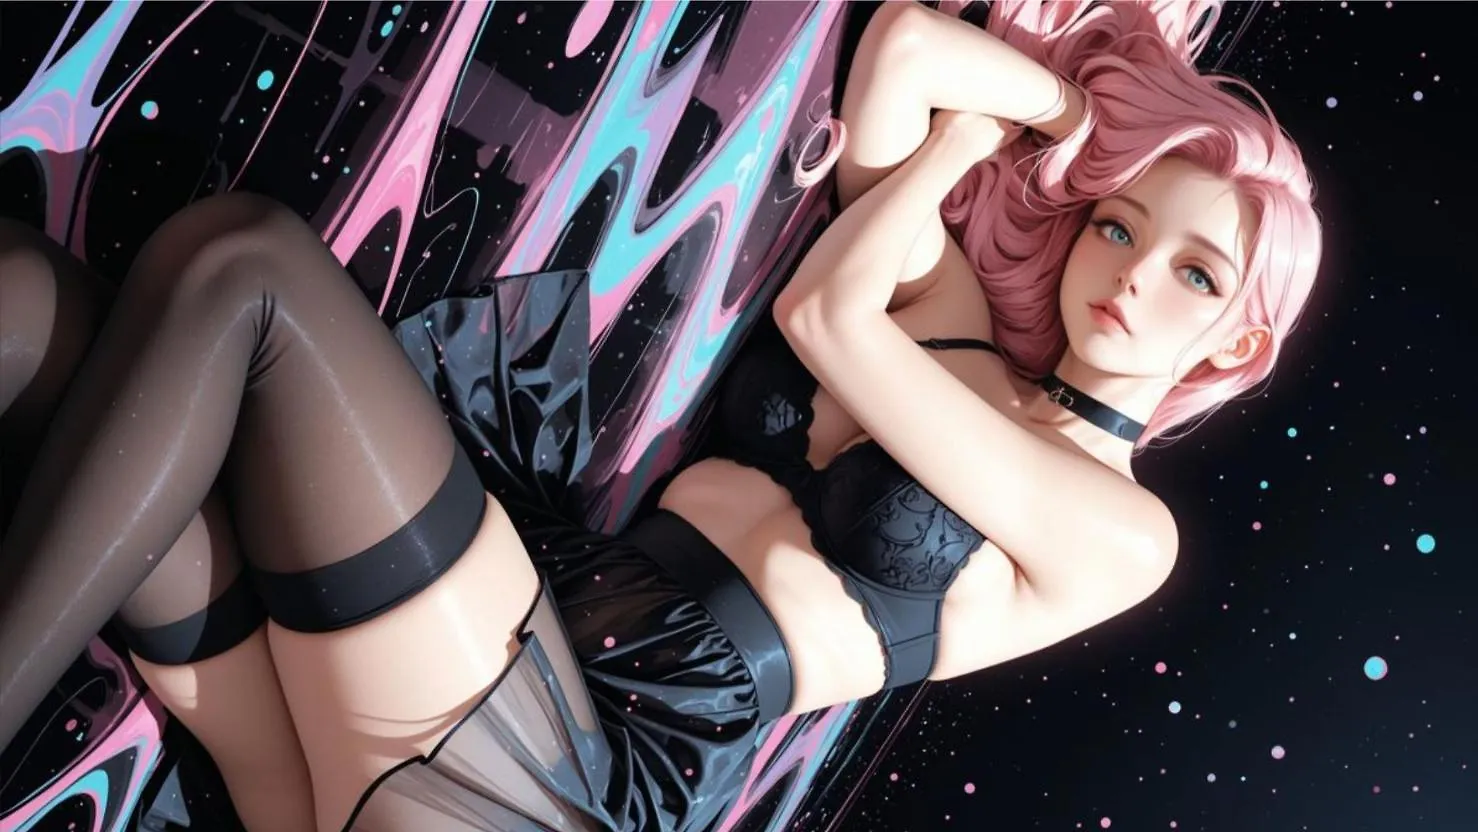
เรามาเริ่มต้นด้วยภาพที่คุณต้องการทำให้เปลือยกันเถอะ
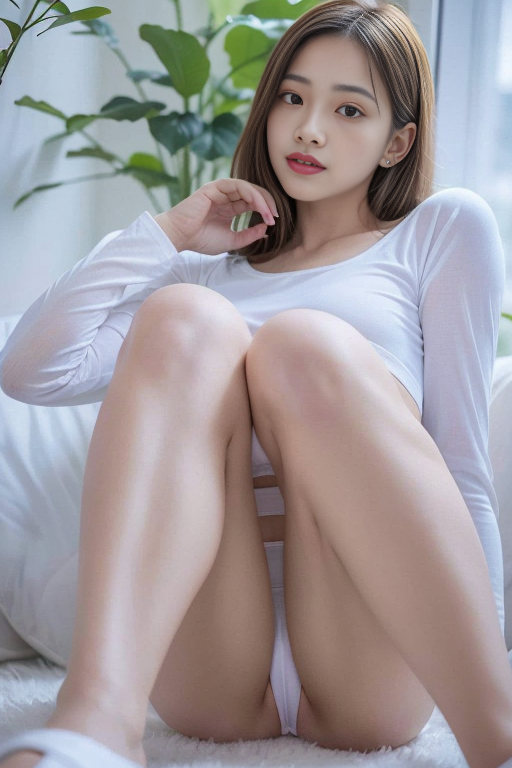
เนื่องจากฉันไม่ต้องการใช้ภาพที่มีลิขสิทธิ์สำหรับบทเรียนนี้ ฉันจะใช้ภาพที่สร้างขึ้นด้วย Stable Diffusion มันเป็นภาพที่ยอดเยี่ยม แต่เราจะทำให้มันเปลือยได้อย่างไร?
โปรดทราบว่าภาพนี้จริงๆ แล้วทำให้เปลือยได้ยาก เนื่องจากเสื้อผ้าอยู่ด้านหลังขา ภาพส่วนใหญ่จะทำได้ง่ายกว่านี้ ดังนั้นมันจึงเป็นตัวอย่างที่ค่อนข้างดีในการใช้
ขั้นตอนที่ 1
เปิด AUTOMATIC1111 (และตรวจสอบให้แน่ใจว่ามีการอัปเดตทั้งหมด) ตรวจสอบ บทเรียนเริ่มต้น หากคุณยังไม่ได้ติดตั้งซอฟต์แวร์นี้
ขั้นตอนที่ 2
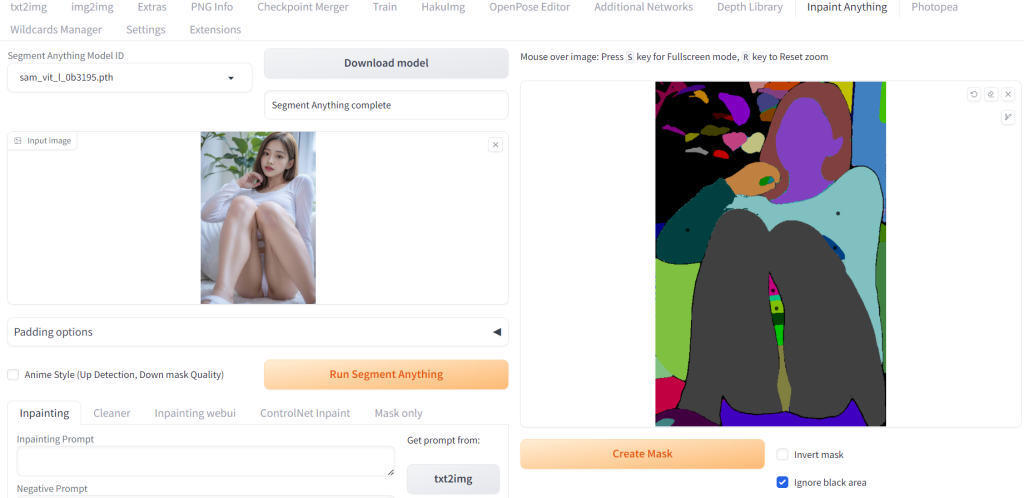
เราจะใช้ส่วนขยาย “Inpaint anything”
https://github.com/Uminosachi/sd-webui-inpaint-anything
ใช้ “inpaint anything” เพื่อสร้างหน้ากากและส่งไปยังแท็บ “inpaint Upload”
3-2 ใช้โหมด inpaint ของ controlnet
3-3 ใช้โหมด open pose ของ controlnet
3-4 ปรับคำ prompt
3-5 หมุนและเลือกอันที่ดีที่สุด
คุณภาพดีที่สุด, ผลงานชิ้นเอก, ความละเอียดสูงสุด, (photorealistic:1.4), ร่างกายส่วนบนของผู้หญิง, เปลือย, แขน, หน้าอก, (nipples:1.2), areolas รายละเอียด, nipples รายละเอียด, negative prompt: ภาพวาด, สเก็ตช์, (คุณภาพแย่ที่สุด:2), (คุณภาพต่ำ:2), (คุณภาพปกติ:2), lowres, คุณภาพปกติ, ((monochrome)), ((grayscale)), จุดผิวหนัง, สิว, รอยด่างผิวหนัง, จุดอายุ, manboobs, backlight, (น่าเกลียด:1.331), (ซ้ำ:1.331), (น่าสยดสยอง:1.21), (บาดเจ็บ:1.21), (tranny:1.331), มือที่กลายพันธุ์, (มือที่วาดไม่ดี:1.331), เบลอ, (กายวิภาคไม่ดี:1.21), (สัดส่วนไม่ดี:1.331), แขนเพิ่มเติม, (ผิดรูป:1.331), (มีนมมากกว่า 2 ข้าง:1.331), (แขนหาย:1.331), (ขาเพิ่มเติม:1.331), (นิ้วที่เชื่อมติดกัน:1.61051), (นิ้วมากเกินไป:1.61051), (ตาไม่ชัดเจน:1.331), มือไม่ดี, นิ้วหาย, นิ้วเพิ่มเติม, (futa:1.1), ร่างกายไม่ดี, ng_deepnegative_v1_75t, easynegative, ขั้นตอน: 30, Sampler: Euler a, CFG scale: 7, Model: majicmixRealistic_v7, Denoising strength: 0.75