Der Ultimative Stable Diffusion LoRA Guide (Download, Nutzung, Training)
g
By gerogero
Updated: March 13, 2026
LoRAs (Low-Rank Adaptationen) sind kleinere Dateien (von 1MB bis 200MB), die Sie mit einem bestehenden Stable Diffusion Checkpoint-Modell kombinieren, um neue Konzepte in Ihre Modelle einzuführen, damit Ihr Modell diese Konzepte generieren kann.
Diese neuen Konzepte fallen im Allgemeinen in 1 von 2 Kategorien: Subjekte oder Stile.
Subjekte können alles sein, von fiktiven Charakteren bis hin zu realen Personen, Gesichtsausdrücken, Posen, Requisiten, Objekten und Umgebungen.
Stile umfassen visuelle Ästhetiken, Kunststile und Künstlerstile.
Kurze Fakten:
- Das Feintuning von KI-Modellen, um spezifische Aufgaben zu erfüllen, kann langsam und schwierig sein. LoRA wurde als schnellere und effizientere Methode zum Feintuning großer Sprachmodelle entwickelt. LoRA wurde 2021 von Microsoft Research entwickelt [Paper][Github].
- Es wurde später an Diffusionsmodelle für die Bildgenerierung angepasst.
- LoRAs sind die beliebteste Methode zur Erstellung benutzerdefinierter Generationen, da die Hardwareanforderungen für ihr Training viel niedriger sind als die von vollständigen Modellen. Ihre geringe Größe macht sie einfach zu teilen und herunterzuladen.
- Sie können Ihre eigene LoRA trainieren mit so wenig wie 10 Trainingsbildern.
- Sie müssen Ihre LoRA auf einem grundlegenden/basismodell trainieren:
- Die realistischsten LoRAs werden heute auf Stable Diffusion v1.5 (oder Modellen, die darauf basieren) trainiert.
- Die meisten Anime/Cartoon/stilisierten LoRAs werden heute auf NAI Diffusion (oder Modellen, die darauf basieren) trainiert.
- Die nächste Generation von LoRAs wird auf SDXL trainiert.
Schnelle Verwendung:
- AUTOMATIC1111-Benutzer können LoRAs verwenden, indem sie sie herunterladen, in den Ordner
stable-diffusion-webui/models/Loralegen und dann die Phrase<lora:LORA-FILENAME:WEIGHT>zu Ihrem Prompt hinzufügen, wobeiLORA-FILENAMEder Dateiname der LoRA ohne die Dateierweiterung ist undWEIGHT(der einen Wert von 0-1 annimmt) die Stärke der LoRA ist. - Manchmal haben LoRAs Triggerwörter, die Sie zusätzlich zu der oben genannten Schlüsselphrase im Prompt verwenden müssen.
- Sie können so viele LoRAs im selben Prompt verwenden, wie Sie möchten.
In diesem Leitfaden werden wir kurz behandeln, was eine LoRA ist, wie sie sich mit anderen Feintuning-Techniken vergleicht, einige beliebte LoRAs vorstellen, Ihnen zeigen, wie Sie sie ausführen, und schließlich, wie Sie eine trainieren.
Dies ist Teil 4 der Serie Stable Diffusion für Anfänger:
Was sind LoRAs?
Eine LoRA ist eine Art Trainingsmethode zum Feintuning von Stable Diffusion-Modellen.
Was ist Feintuning?
Angenommen, wir möchten ein Bildmodell trainieren, um Bilder von unserem eigenen Abbild zu generieren.
Ein Modell von Grund auf neu zu trainieren, wäre extrem teuer und für die meisten Menschen unerschwinglich.
Anstatt ein neues Modell von Grund auf zu trainieren, können wir ein bestehendes als Ausgangspunkt wiederverwenden. Wir können ein Modell wie Stable Diffusion v1.5 nehmen und es auf einem viel kleineren Datensatz (den Bildern von uns) trainieren, wodurch ein Modell entsteht, das gleichzeitig gut in der breiten Aufgabe der Generierung realistischer Bilder und der engen Aufgabe der Generierung von Bildern unseres Abbilds ist.
LoRA vs Dreambooth
Dreambooth ist eine weitere Feintuning-Technik, die es Ihnen ermöglicht, Ihr Modell auf einem Konzept wie einem Charakter oder Stil zu trainieren. Praktisch gesehen sind Dreambooth und LoRA dazu gedacht, dasselbe zu erreichen.
Der Unterschied besteht darin, dass Dreambooth das gesamte Modell aktualisiert, während LoRA eine kleine Datei extern zum Modell ausgibt.
Das bedeutet, dass das Training mit Dreambooth ein vollständiges Checkpoint-Modell erzeugt (das ist eine der Hauptmethoden, mit denen Menschen benutzerdefinierte Modelle erstellen), während LoRA-Dateien in Kombination mit einem bestehenden Checkpoint-Modell verwendet werden müssen.
In Bezug auf die Qualität ist eine gut trainierte LoRA mit einem Dreambooth-Modell vergleichbar. LoRA hat den Vorteil eines viel schnelleren Trainingsprozesses, geringerer GPU-Anforderungen und kleinerer Ausgaben.
LoRA vs Hypernetwork
Hypernetworks funktionieren fast genau wie LoRA. Sie sind ebenfalls kleinere Dateien, die Sie mit Checkpoint-Modellen verwenden, um neue Konzepte in Ihre Generationen einzuführen.
Der Unterschied ist technischer Natur: Hypernetworks und LoRAs ändern beide Werte, während sie durch die Aufmerksamkeits-Schichten des Modells gehen, tun dies jedoch unterschiedlich.
Sie können sie als „veraltete LoRAs“ betrachten, da sie weitgehend obsolet geworden sind.
Wenn Sie jedoch ein Hypernetwork haben, das Sie verwenden und mögen, gibt es keinen Grund, es nicht weiter zu verwenden.
LoRA vs Textuelle Inversion
LoRA und Dreambooth sind dazu gedacht, einem Modell ein neues Konzept beizubringen.
Textuelle Inversion/Embeddings
Nehmen wir Gesichter als Beispiel. Wenn wir eine textuelle Inversion verwenden, um ein Gesicht zu generieren, generiert das Modell kein „neues“ Gesicht.
Stattdessen ist unsere textuelle Inversion einfach eine Abkürzung für die spezifische Kombination von Nase/Kinn/Mund/Augen, die bereits im Modell vorhanden ist und dem ähnelt, was wir wollen.
Sie können die Einschränkung sehen: Wenn es nicht bereits im Modell vorhanden ist, kann es nicht durch eine textuelle Inversion erzeugt werden.
Textuelle Inversionen sind nach wie vor sehr beliebt, da sie in negativen Prompts verwendet werden (eine Verwendung, die häufig als „negative Einbettung“ bezeichnet wird). Menschen trainieren textuelle Inversionen auf unerwünschte Dinge wie schlechte Hände und Mutationen. Wenn wir diese in unsere negativen Prompts einfügen, können wir fast jeden Prompt verbessern.
Was können LoRAs tun?
LoRAs sind äußerst vielseitig. Hier sind einige Konzepte, auf denen die Stable Diffusion-Community LoRAs trainiert hat:
- Qualitätsverbesserungen (z.B. Detail Tweaker)
- Stile/Ästhetiken (z.B. Arcane-Stil, Studio Ghibli-Stil, Anime Lineart)
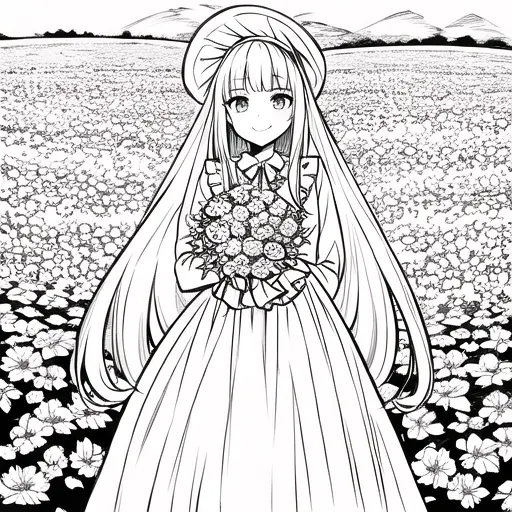
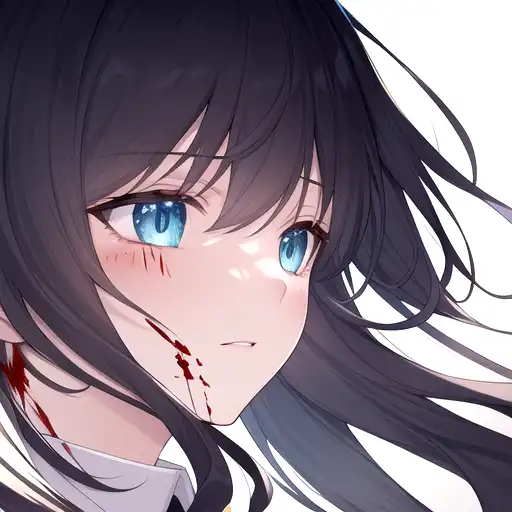
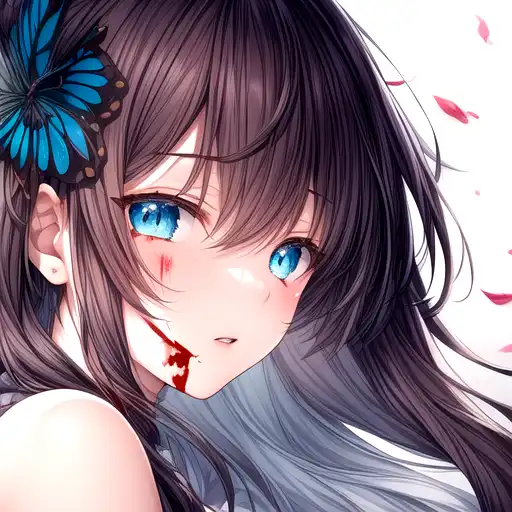
- Charaktere oder Personen (z.B. Makima, Cute_girl_mix)
- Kleidung oder Objekte (z.B. Hanfu, Taiwanesisches Essen)
- Einstellungen (z.B. Schulgebäude)
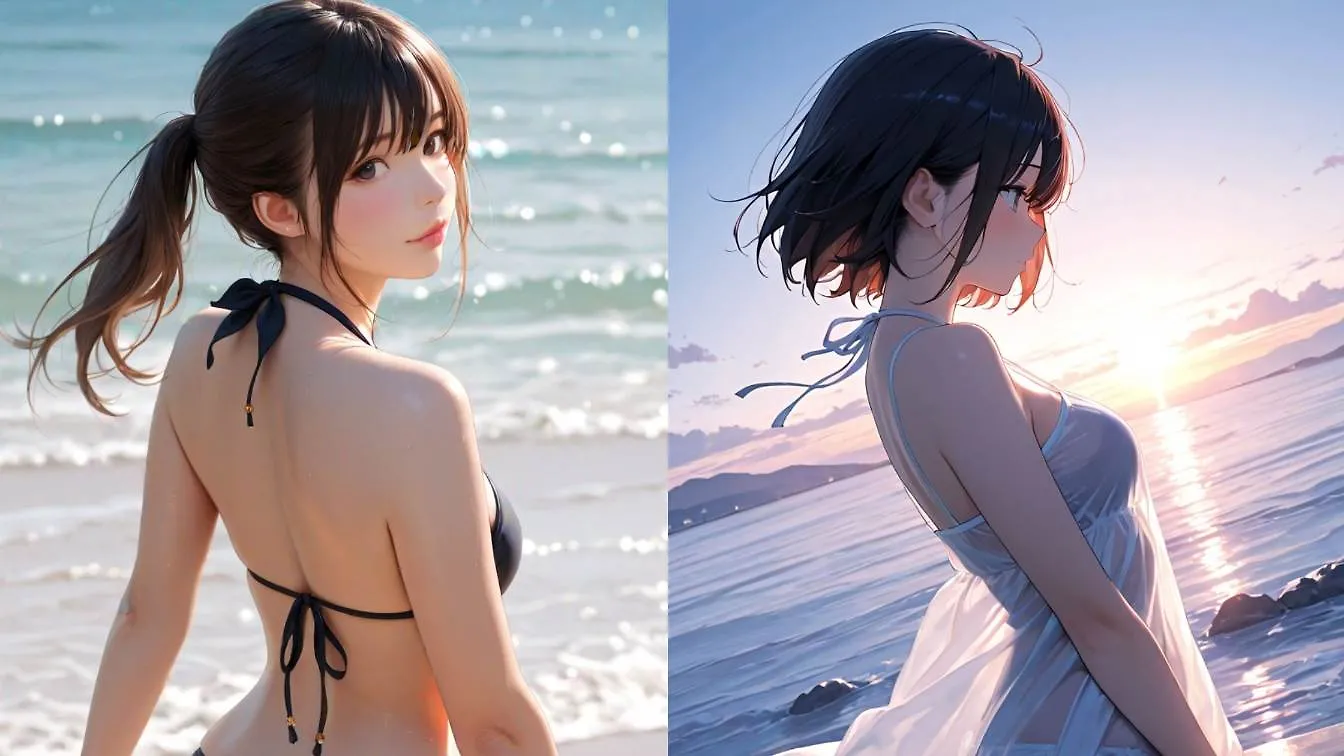
Die folgenden Generationen verwenden dasselbe Modell, denselben Prompt und denselben Seed. Der einzige Unterschied ist das Vorhandensein der LoRA:
Sie können LoRAs mit jedem Stable Diffusion-Modell verwenden, solange das Modell und die LoRA beide Teil derselben Serie sind:
- LoRAs, die von SD v1.x trainiert wurden, funktionieren nur mit Modellen, die von SD v1.x trainiert wurden.
- LoRAs, die von SD v2.x trainiert wurden, funktionieren nur mit Modellen, die von SD v2.x trainiert wurden.
- LoRAs, die von SDXL trainiert wurden, funktionieren nur mit Modellen, die von SDXL trainiert wurden.
Im Allgemeinen funktionieren realistische LoRAs besser mit realistischen Modellen, und Anime-LoRAs funktionieren besser mit Anime-Modellen. Diese Unterscheidung ist jedoch nicht so klar, da die meisten beliebten Modelle heute Kombinationen aus realistischen und Anime/stilisierten Modellen sind.
Manchmal haben die Ersteller in ihren LoRA-Beschreibungen Hinweise zu empfohlenen Modellen.
Wo können Sie LoRAs herunterladen?
Es gibt 2 Orte, um LoRAs zu finden:
- Civitai.com: Am beliebtesten und empfohlen.
- HuggingFace.co: Weniger beliebt. Das Problem ist, dass HuggingFace LoRAs in dieselbe Kategorie wie Checkpoint-Modelle einordnet, sodass es keinen einfachen Weg gibt, sie zu finden.
Ich werde nicht im Detail auf NSFW LoRAs eingehen, aber es gibt viele auf Civitai, Sie müssen nur ein Konto erstellen, um sie zu sehen.
Beliebte LoRAs
Allzweck-LoRAs
LoRAs können verwendet werden, um die Bildqualität zu verbessern oder interessante Variationen eines Bildes zu erzeugen.
- epinoiseoffset – erhöht den Kontrast für bessere Qualitätsbilder. Empfohlen 🔥
- Detail Tweaker – erhöht oder verringert den Detaillierungsgrad. Empfohlen 🔥
- CharTurnerBeta – erstellt Charakterdrehungen für das Charakterdesign.
Stil/Ästhetik LoRAs
Erzeugen Sie eine bestimmte Ästhetik oder Kunststil.
- Colorwater – Aquarellstil
- Anime Lineart – Lineart / Malbuchstil
- Anime Tarotkarten-Kunststil – komplizierter Tarotkarten-Illustrationsstil
- Blindbox – 3D Chibi-Stil
- Anime Magazin-Cover – Magazin-Cover-Stil
Charakter-/Personen-LoRAs
Erstellen Sie einen fiktiven Charakter oder eine reale Person.
Kostüm-LoRAs
- 【Kostüm】Straitjacket – fügt Charakteren einen Zwangsanzug hinzu.
- Oversized Sweater/Hoodie
- Urban Samurai – Techwear & Katanas
Wie man LoRAs verwendet
Mit AUTOMATIC1111
Voraussetzung: Sie haben ein funktionierendes und aktualisiertes AUTOMATIC1111. Hier sind plattformspezifische Anweisungen:
Sie müssen auch ein Checkpoint-Modell heruntergeladen und in den Ordner stable-diffusion-webui/models/Stable-diffusion gelegt haben. Ich werde in diesem Beispiel Anything V3 verwenden.
- Laden Sie die LoRA-Datei (
.ptoder.safetensor) herunter und legen Sie sie in den Ordnerstable-diffusion-webui/models/Lora. Als Beispiel verwende ich Detail Tweaker, aber Sie können jede LoRA verwenden, die Sie möchten. - Starten Sie Ihre WebUI (klicken Sie auf
webui-user.bat). - Unter dem
Generate-Button klicken Sie auf dasShow Extra Networks-Symbol. Es ist ein kleines pinkes Symbol:
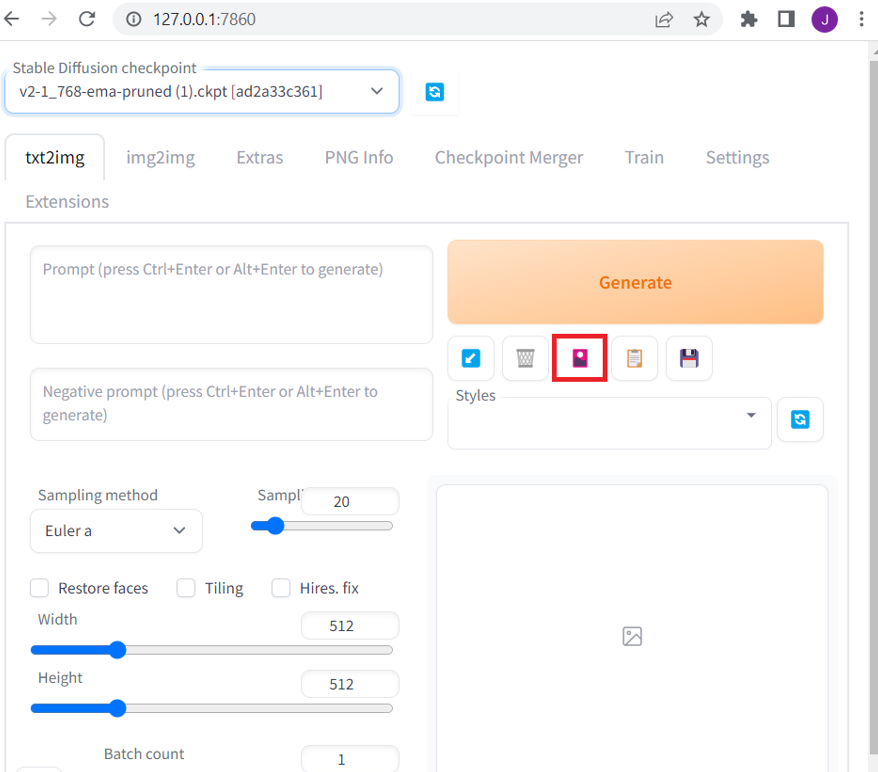
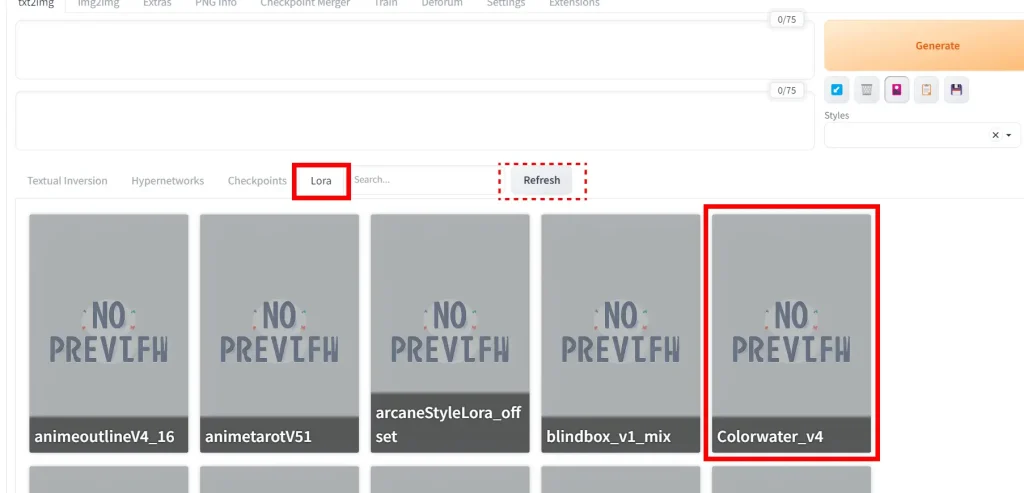
Klicken Sie auf die LoRA-Registerkarte. Es werden alle LoRAs im Ordner stable-diffusion-webui/models/Lora angezeigt (wenn Sie nichts sehen, klicken Sie auf die graue Refresh-Schaltfläche).
Klicken Sie auf die gewünschte LoRA, und die LoRA-Schlüsselphrase wird zu Ihrem Prompt hinzugefügt. Sie können so viele LoRAs im selben Prompt verwenden, wie Sie möchten.
Sie können die LoRA-Schlüsselphrase auch manuell eingeben. Sie folgt dem Format: <lora:LORA-FILENAME:WEIGHT>
LORA-FILENAME ist der Dateiname des LoRA-Modells, ohne die Dateierweiterung (z.B. ohne .safetensor).
WEIGHT ist, wie stark Sie die LoRA haben möchten. Der Bereich liegt zwischen 0-1; 0 ist dasselbe wie das Deaktivieren der LoRA, 1 ist maximale Stärke. Bei vielen LoRAs kann ein Gewicht von 1 überwältigend sein, sodass Sie mit niedrigeren Werten wie 0.5 bis 0.8 experimentieren sollten.
(Detail Tweaker ist ein wenig besonders. Es geht in 2 Richtungen und akzeptiert alles zwischen -1 und 1. -1 entfernt Details, und 1 fügt Details hinzu.)
Triggerwörter: Manchmal haben LoRAs Triggerwörter. Dies sind Wörter, die das Konzept aktivieren.
(Unser Beispiel Detail Tweaker hat keine Triggerwörter. Bei einer LoRA wie Anime Lineart möchten Sie jedoch „lineart“ in Ihrem Prompt einfügen. Der Ersteller wird Ihnen normalerweise diese Triggerwörter mitteilen, falls vorhanden, in der LoRA-Beschreibung.)
Beispiel
Schreiben Sie den Prompt:
(extrem detailliertes CG Unity 8k Hintergrundbild),(Meisterwerk), (beste Qualität), (ultra-detailliert), (beste Illustration),(bester Schatten),(ein extrem zartes und schönes), dynamischer Winkel, schwebend, fein detailliert, Tiefenschärfe, 1 Mädchen, solo, Mädchen mit schön detailliertem verzweifeltem Gesicht und langen flatternden Haaren und schönen detaillierten Augen, ((Blut)) <lora:add_detail:1>Und den negativen Prompt:
mutierte Hände und Finger:1.5, lowres, schlechte Anatomie, schlechte Hände, verschmolzene Finger, Textfehler, flüssige Ziffer, fehlende Finger, zusätzliche Ziffern, deformierte Füße, weniger Ziffern, beschnitten, verschmolzene Füße, schlechteste Qualität, niedrige Qualität, Standardqualität, JPEG-Artefakte, Unterschrift, Wasserzeichen, Benutzername, verschwommen, schlechter Mund, rissiger MundSetzen Sie den Seed: 3944989649
Und klicken Sie dann auf Generieren. Hier ist, was ich bekomme.
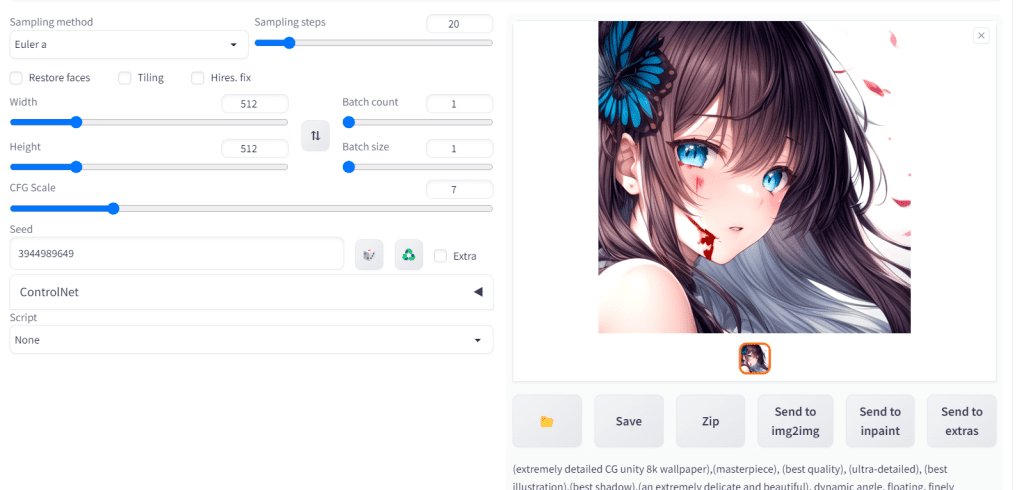
Stellen Sie sicher, dass Ihre Einstellungen alle gleich sind, wenn Sie versuchen, Schritt zu halten. Ich verwende den Euler a-Sampler, 20 Sampling-Schritte und eine 7 CFG-Skala.
Wie können Sie feststellen, was die LoRA tatsächlich tut?
Ändern Sie <lora:add_detail:1> in <lora:add_detail:0> (deaktivieren Sie die LoRA vollständig) und regenerieren Sie.
Ändern Sie dann diesen Satz in <lora:add_detail:-1> und regenerieren Sie (denken Sie daran, dass die negative Richtung Details entfernt).
Dann können wir die Generationen vergleichen:
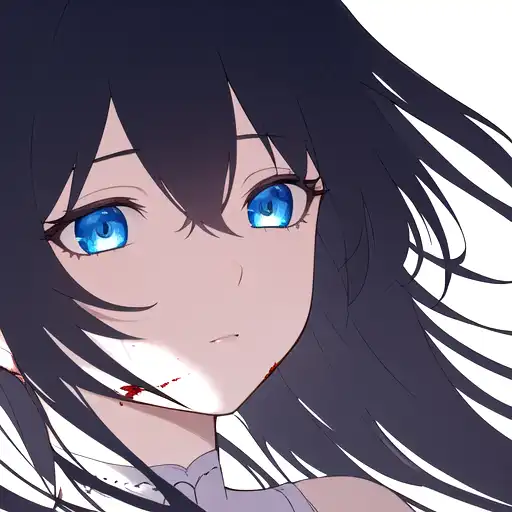
Das Hinzufügen von Details erhöht die Details, das Licht und die Texturen. Das Entfernen von Details hingegen erzeugt eine flache Stilillustration, die auf ihre eigene Weise ansprechend ist.
Training von LoRAs
Das Training von LoRAs wurde mit dem Backen eines Kuchens verglichen, und das ist die beste Analogie, die ich bisher gesehen habe.
Sie versuchen, die besten Zutaten (Trainingsbilder) zu bekommen, die richtige Temperatur (Einstellungen) zu verwenden, aber nachdem Sie es in den Ofen geschoben haben (Training starten), können Sie nur beten, dass alles gut geht.
Sie werden keine Ahnung haben, ob es erfolgreich sein wird oder nicht, bis es tatsächlich abgeschlossen ist (obwohl Sie den Fortschritt überprüfen können).
Deshalb ist es wichtig, sich zu engagieren und zu BACKEN, anstatt zu versuchen, die „perfekte LoRA“ zu erstellen. Sie sollten mehr Zeit mit dem Backen und weniger Zeit mit dem Lesen verbringen!
Eine fehlgeschlagene LoRA wird Ihnen viel mehr beibringen als jeder Leitfaden, den Sie lesen. Verwenden Sie die Standardwerte unten und beheben Sie von dort aus. Es ist unmöglich, genau vorherzusagen, was die KI tun wird, mit welchen Elementen sie Schwierigkeiten haben wird, wie sie die gegebenen Bilder akzeptiert und so weiter.
Der gute Teil: Jede LoRA, die Sie trainieren, wird Ihnen ein besseres Gefühl und neue Einblicke geben, wie Sie die nächste besser trainieren können.
Ich behaupte nicht, dass dies der „richtige“ Weg ist zu trainieren. Dies sind einige bewährte Praktiken, die ich beim Training von etwa 40 LoRAs gelernt habe.
Ich habe einen separaten Leitfaden für das Training von SDXL LoRAs mit Runpod geschrieben.
Bevor Sie beginnen, benötigen Sie:
- NVIDIA GPU mit mindestens 6GB, aber realistisch gesehen 8GB oder mehr VRAM (Lösungen für AMD-Karten existieren, sind aber nicht ausgereift)
- Wenn Sie keine NVIDIA haben, nicht genug VRAM haben oder einfach schneller trainieren möchten, können Sie Google Colab für Ihr Training verwenden.
- Ein grundlegendes Modell:
- Viele (aber nicht alle) Modelle eignen sich als Ihr grundlegendes/basismodell. Wählen Sie ein Modell, das gut für das ist, was Sie versuchen zu tun. Mehr Modellvorschläge unten.
- Hier sind einige Ideen:
- Für Anime/Cartoon-Stil wählen Sie ein NAI-Familienmodell: NAI Diffusion, AnythingV3.0, AnythingV4.0, AnythingV4.5, AnythingV5.
- Für realistischen Stil wählen Sie Stable Diffusion v1.5, oder wenn Sie 12GB VRAM haben, können Sie SDXL verwenden.
Hier ist, was wir tun werden:
- Trainingsbilder vorbereiten
- Ordnerstruktur erstellen
- Koyha SS installieren
- Beschriftung/Tagging
- LoRA trainieren
Schritt 1: Trainingsbilder vorbereiten
Entscheiden Sie, was das Thema Ihrer LoRA sein soll, bevor Sie beginnen.
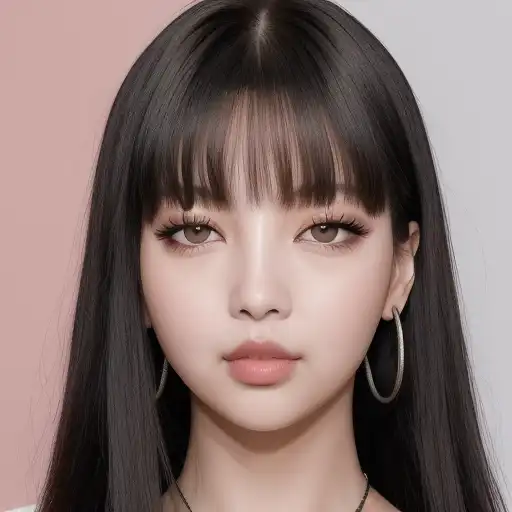
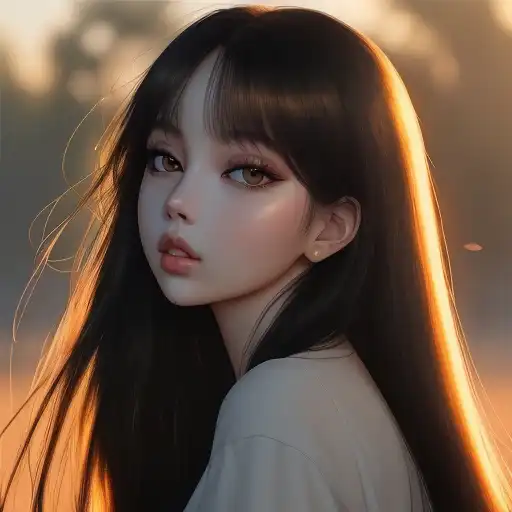
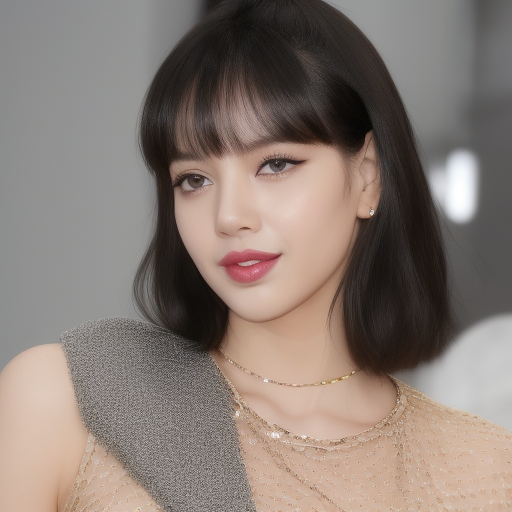
Einer unserer Abonnenten hat mir einen Datensatz von Lisa, der K-Pop-Künstlerin, geschickt:
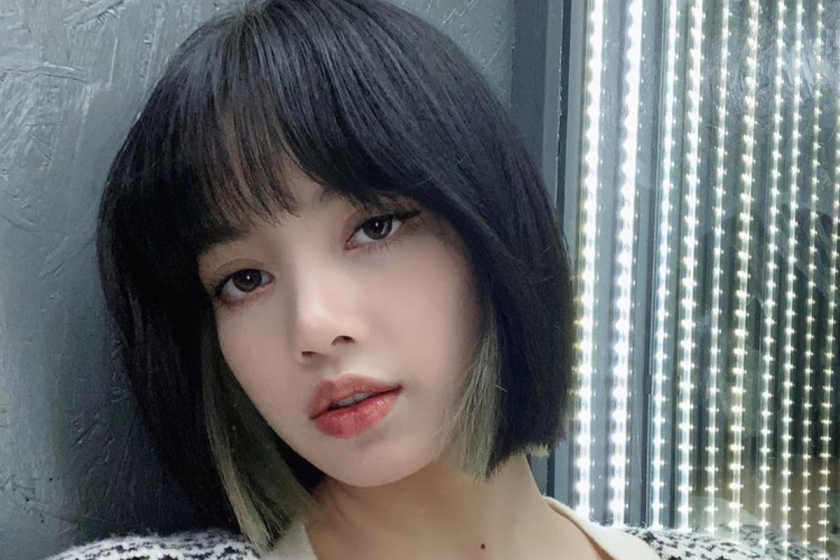
Ich werde dies als Beispiel verwenden, um eine LoRA Schritt für Schritt zu trainieren. Hier sind die Bilder, die die LoRA erzeugen kann, wenn sie fertig ist:
Der Datensatz hat 34 Bilder. Je mehr Bilder, desto besser, aber Qualität zählt. Fügen Sie keine Bilder nur der Bilder wegen hinzu, wenn sie von geringer Qualität sind.
Verwenden Sie nur JPGs und PNGs. Konvertieren Sie alle WEBP-Bilder in JPG/PNG, bevor Sie beginnen.
Wenn Sie einen Charakter erstellen, stellen Sie sicher, dass Ihre Bilder Folgendes enthalten:
- Einzigartige Posen
- Einzigartige Zoomwinkel
- Unterschiedliche Outfits
- Unterschiedliche Farben
- Höhere Auflösung als 512×512
Bildquellen
Hier sind einige hilfreiche Websites, um Bilder zu erhalten:
- Pinterest: Großartig für Vielseitigkeit. Sie werden wahrscheinlich finden, wonach Sie suchen.
- Danbooru: Größte Booru-Website – die meisten Anime-Checkpoint-Modelle und LoRAs beziehen ihre Bilder von hier.
- Safebooru: Wie Danbooru, aber nur für SFW-Bilder.
- MovieStillsDB: Archiv von über 1 Million Filmstills, durchsuchbar nach Schauspielern und Filmtiteln.
Schritt 2: Ordnerstruktur
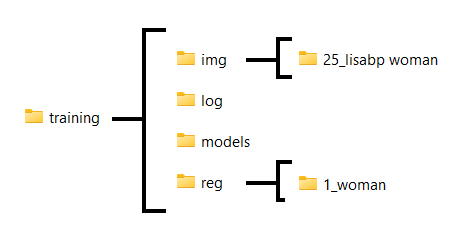
Erstellen Sie diese Ordnerstruktur:
img: Dies ist der Ordner, der den Bildordner enthält.- Erstellen Sie innerhalb dieses
img-Ordners einen Unterordner nach der KonventionREPEATS_TRIGGERCLASSREPEATSist die Anzahl der Durchgänge, die der Trainingsalgorithmus über jedes Bild pro Epoche machen wird.
Eine gute Zahl ist 200-400 geteilt durch die Anzahl der Bilder, die Sie haben, abgerundet. z.B. 34 Bilder, 200 / 34 ≈ 6 (es gibt keine festen Regeln, wenn es darum geht, diese Zahl auszuwählen. Ich werde erklären, warum ich sie so berechne unten)
DerTRIGGERist etwas, das in Ihrem Prompt erwähnt wird, damit die LoRA korrekt angewendet wird. Wählen Sie etwas Einzigartiges, das das Modell nicht als etwas anderes interpretieren wird —>lisabp, ich werde „lisa“ nicht verwenden, da das Modell dies möglicherweise als etwas anderes interpretieren könnte.
Für dieCLASSverwenden Sie die breite Klasse von Dingen, in die Ihr Subjekt fällt. —>woman
Ich würde meinen Ordner6_lisabp womannennen.
Fügen Sie nichts anderes in diesen Ordner ein!
- Erstellen Sie innerhalb dieses
model: In diesem Ordner werden Ihre endgültigen Modelle abgelegt.log(optional): Wo Ihre Protokolle gespeichert werden.reg(optional): Hier werden Regularisierungsbilder abgelegt. Dies ist optional, aber sehr empfohlen.- Erstellen Sie einen Unterordner im folgenden Format:
1_CLASS, wobei:CLASS: dasselbe sein sollte wie das, was bei der Benennung Ihres Bildordners oben verwendet wurde —>woman
In diesem Beispiel würden wir1_womanverwenden.
- Erstellen Sie einen Unterordner im folgenden Format:
Ich halte es gerne so, dass alles im selben Ordner ist, um organisiert zu bleiben. Ich werde am Ende mit einer Ordnerstruktur enden, die so aussieht:
Schritt 3: Regularisierungsbilder für das Training
Regularisierungsbilder sind optional. Sie können Regularisierungsbilder vollständig ausschließen und fast alles problemlos trainieren.
Es gibt verschiedene Möglichkeiten, um Regularisierungsbilder zu erhalten.
Hier sind einige vorgefertigte Sets, die Sie herunterladen können:
https://huggingface.co/datasets/ProGamerGov/StableDiffusion-v1-5-Regularization-Images/tree/main
Ich werde das „Frauen“-Datenset woman_v1-5_mse_vae_ddim50_cfg7_n4420.zip verwenden.
Laden Sie das Set herunter, das Sie für Ihr Thema am besten geeignet halten. Entpacken Sie den Zip-Ordner.
Kopieren Sie mindestens X Bilder in den Unterordner im reg-Ordner, den Sie im vorherigen Schritt erstellt haben (meiner heißt 1_woman), wobei X = REPEATS * ANZAHL DER TRAININGSBILDER.
In unserem Fall sind das 6*34 = 204 Bilder.
Schritt 4: Koyha SS installieren
Koyha SS ist die beste Benutzeroberfläche für das Training von Modellen zurzeit.
Erforderliche Abhängigkeiten
- Installieren Sie Python 3.10
- Stellen Sie sicher, dass Sie das Kästchen aktivieren, um Python zur „PATH“-Umgebungsvariable hinzuzufügen.
- Installieren Sie Git
- Installieren Sie Visual Studio 2015, 2017, 2019 und 2022 redistributable
Öffnen Sie ein Eingabeaufforderungsfenster (Suchen Sie in der Suchleiste nach „Eingabeaufforderung“, klicken Sie auf Eingabeaufforderung).
Navigieren Sie in der Eingabeaufforderung zu dem Ort, an dem Sie Koyha installieren möchten.
Verwenden Sie diesen Befehl, um in den Ordner zu wechseln (drücken Sie Enter, um ihn auszuführen):
cd FOLDER_NAMEVerwenden Sie diesen Befehl, um in den übergeordneten Ordner zu wechseln:
cd ..Verwenden Sie diesen Befehl, um alle Ordner innerhalb des Ordners aufzulisten, in dem Sie sich befinden. Dies kann Ihnen helfen, sich zu orientieren:
dirAls Beispiel werde ich Koyha in meinem Documents -Ordner installieren. Ich würde diesen Befehl eingeben:
cd documents
Kopieren Sie jede Zeile, eine nach der anderen, und drücken Sie die Eingabetaste.
git clone https://github.com/bmaltais/kohya_ss.git
cd kohya_ss
.\setup.bat
Geben Sie 1 ein und dann 1 für die Optionen:
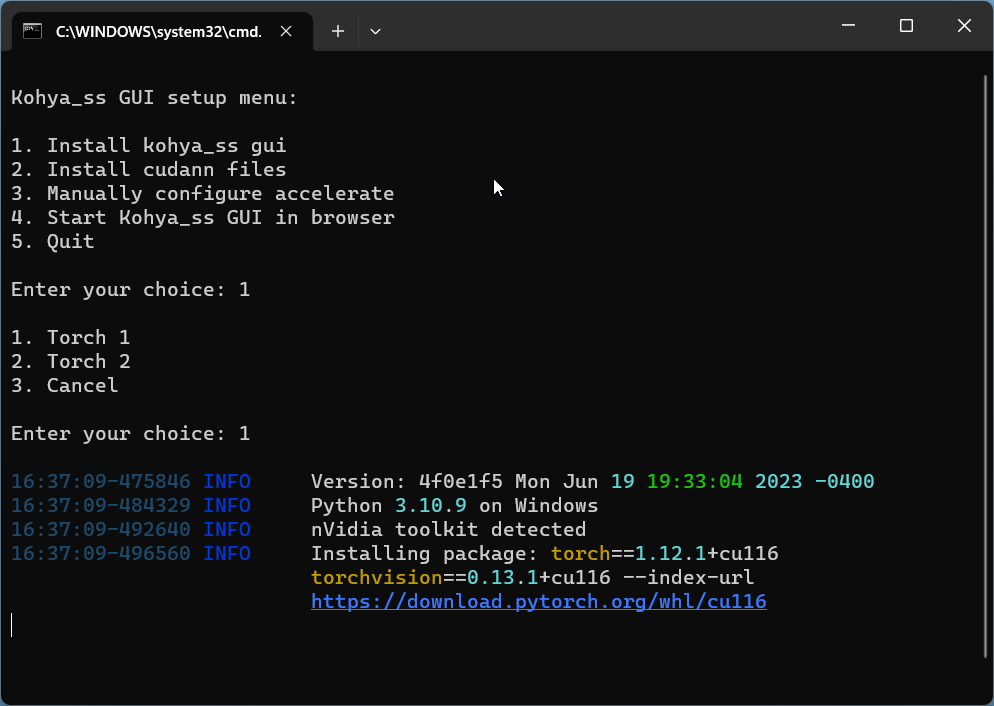
Hinweis: Es kann eine Weile dauern, bis die Pakete vollständig installiert sind.
Wenn die Installation abgeschlossen ist, geben Sie 4 ein, was die Option ist, Kohya_ss GUI im Browser starten.
In ein paar Sekunden sollte Ihnen die Erfolgsnachricht angezeigt werden:
Running on local URL: http://127.0.0.1:7860
Gehen Sie zu dieser URL in Ihrem Webbrowser http://127.0.0.1:7860, um die Benutzeroberfläche zu öffnen:
Schritt 5: Bilder beschriften
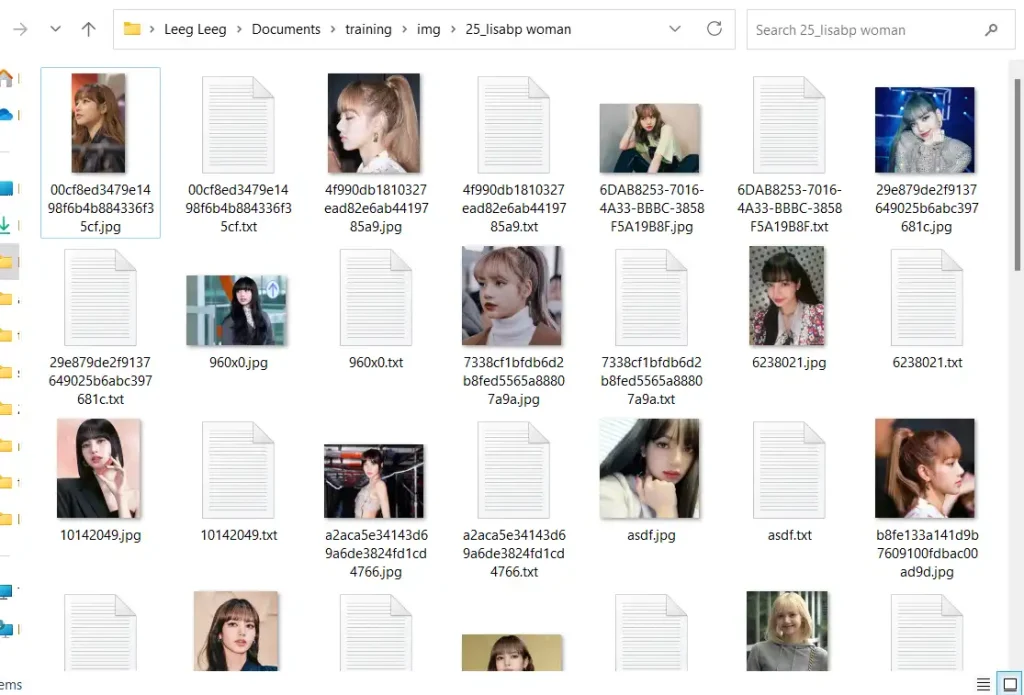
Jedes Bild in Ihren Trainingsdaten benötigt eine entsprechende Beschriftung oder eine .txt-Datei, die den Inhalt des Bildes beschreibt.
Glücklicherweise hat Koyha ein integriertes Tool zum automatischen Erkennen und Beschriften von Bildern.
Es wird uns helfen, mit natürlichen Sprachsätzen wie: „Mädchen mit gelbem Kleid, das sitzt“, sowie durch Kommas getrennten Tags wie „1girl, gelbes Kleid, sitzt“ zu beschriften. Der Stil der Beschriftung hängt davon ab, ob Ihr Subjekt realistisch oder anime/stilisiert ist.
Für realistische Subjekte
Klicken Sie auf die Registerkarte Utilities -> Registerkarte Captioning -> Registerkarte BLIP Captioning.
Wählen Sie im Image folder to caption den Ordner mit Ihren Trainingsbildern aus.
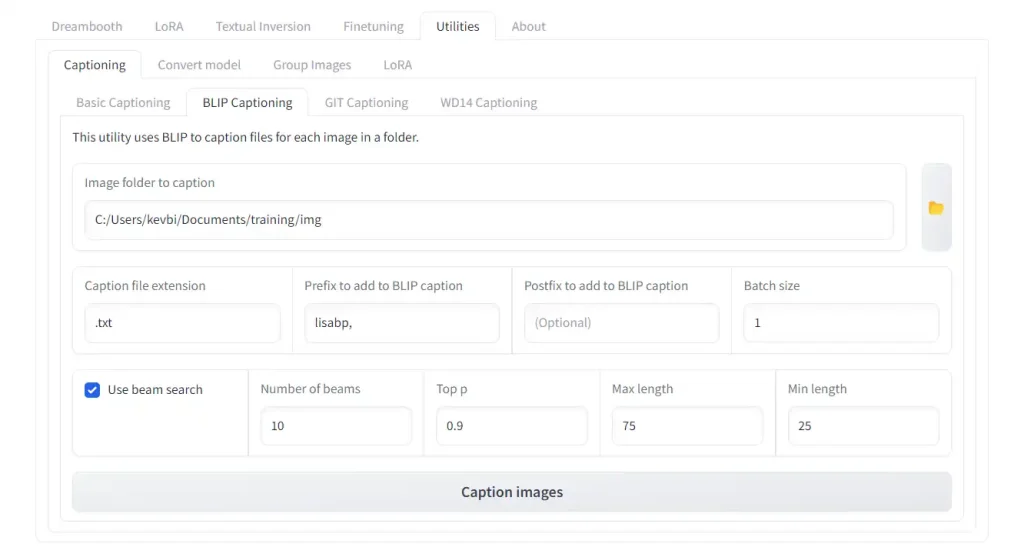
Für die Einstellungen:
Prefix to add to BLIP caption: Fügen Sie Ihr gewähltes Triggerwort hinzu, gefolgt von einem Komma und einem Leerzeichen. In unserem Fall „lisabp, „Batch size: Bleiben Sie bei 1-2, es sei denn, Sie haben eine GPU mit höherem VRAM.Use beam search: AktiviertNumber of beams: Wenn Sie diese Einstellung erhöhen, erzeugt dies kohärentere „satzähnliche“ Beschriftungen. Setzen Sie dies zwischen 10-15.Min length: Setzen Sie dies auf 25-30, andernfalls werden die Beschriftungen zu kurz.
Klicken Sie auf „Caption Images“. Das erste Mal, wenn Sie dies tun, wird es eine Weile dauern, um den BLIP-Beschrifter herunterzuladen. Überprüfen Sie Ihr Eingabeaufforderungsfenster auf Statusaktualisierungen.
Nachdem die Beschriftung abgeschlossen ist, wird das Tool die Beschriftungsdateien automatisch im selben Ordner wie Ihre Trainingsbilder ablegen.
Für Anime-/stilistische Subjekte
Anime-Subjekte erfordern einen anderen Beschriftungsstil.
Klicken Sie auf die Registerkarte Utilities -> Registerkarte Captioning -> Registerkarte WD14 Captioning.
Wählen Sie im Image folder to caption den Ordner mit Ihren Trainingsbildern aus.
Wenn Sie eine Stil-LoRA trainieren, können Sie die Standardeinstellungen beibehalten. Wenn Sie eine Charakter-LoRA trainieren, ändern Sie die Einstellung Character Threshold auf 0.7.
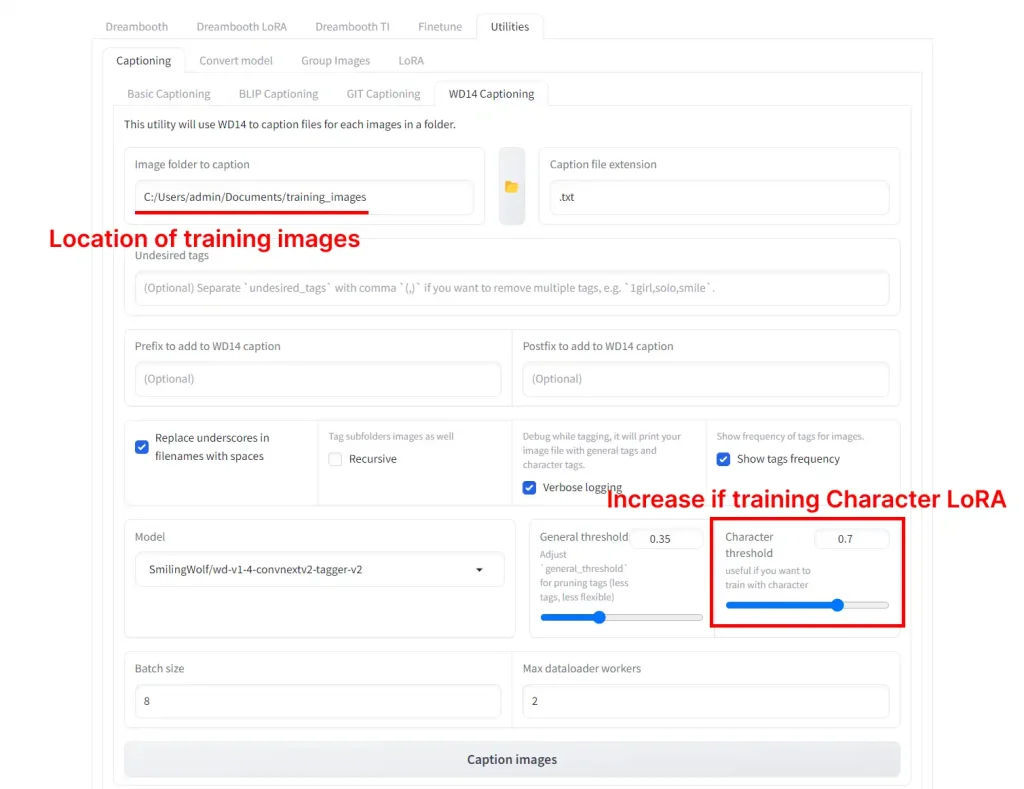
Klicken Sie auf „Caption Images“. Das erste Mal, wenn Sie dies tun, wird es eine Weile dauern, um den Blip-Beschrifter herunterzuladen. Überprüfen Sie Ihr Eingabeaufforderungsfenster auf Statusaktualisierungen.
Nachdem die Beschriftung abgeschlossen ist, wird das Tool die Beschriftungsdateien automatisch im selben Ordner wie Ihre Trainingsbilder ablegen.
Schritt 6: Training
Sie sind endlich bereit zu trainieren!
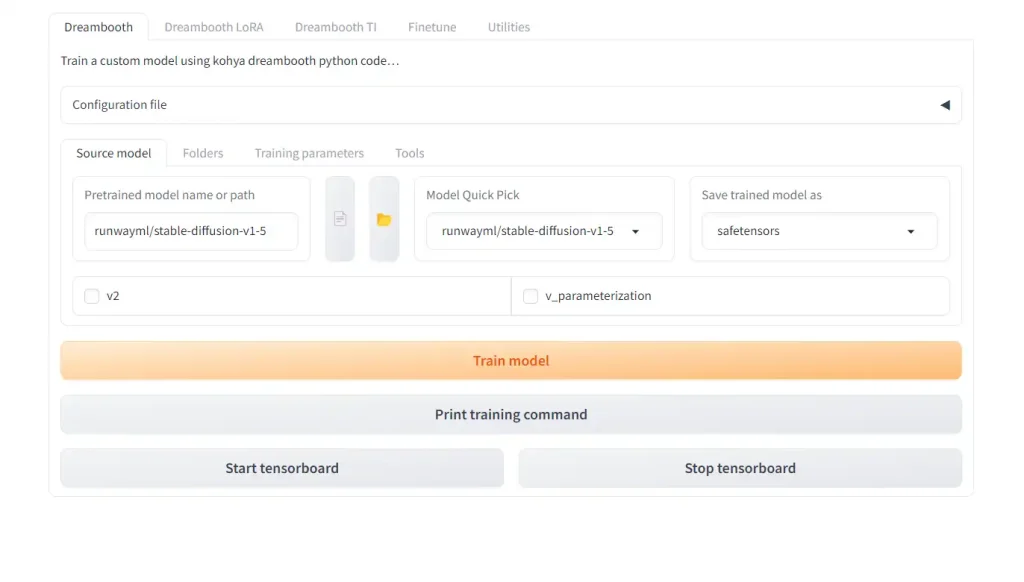
Stellen Sie sicher, dass Sie zur LoRA -Registerkarte wechseln und sich nicht auf der Dreambooth -Registerkarte befinden. Dies hat viel Verwirrung verursacht, da die Inhalte der Registerkarten gleich aussehen.

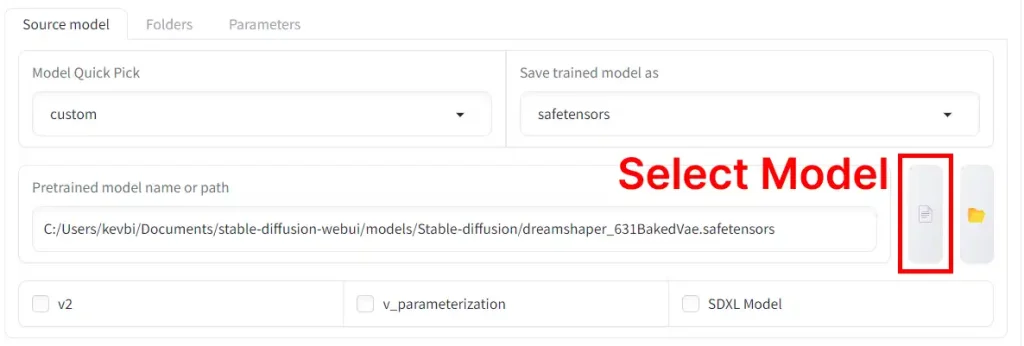
Modellauswahl
Wählen Sie das grundlegende (Basis-) Modell aus, auf dem Sie Ihre LoRA trainieren möchten.
Model Quick Pick ermöglicht es Ihnen, die Basismodelle von StabilityAI und seinen Partnern zu verwenden:

Wenn Sie custom auswählen, können Sie ein Modell auswählen, das Sie heruntergeladen haben.
Weitere Optionen:
v2Kontrollkästchen: Aktivieren Sie das v2-Kontrollkästchen, wenn Sie Stable Diffusion v2.0 oder v2.1 als Basis verwenden oder ein Modell, das von diesen feingetunt wurde.SDXL ModelKontrollkästchen: Aktivieren Sie das SDXL Model-Kontrollkästchen, wenn Sie SDXL v1.0 als Basis verwenden oder ein Modell, das von SDXL feingetunt wurde. Dies erfordert mindestens 12 GB VRAM. Wenn Sie nicht genug VRAM haben, versuchen Sie Google Colab.
Die Basismodelle funktionieren gut; manchmal funktionieren benutzerdefinierte Modelle besser. Hier sind einige Modelle, die ich für das Training empfehle:
- NeverEnding Dream – Großartiges Modell für das Training von Charakteren und spezifischen Subjekten (BLIP oder WD14 funktionieren beide)
- Anything V5 – Anything V3 leitete eine Generation von Anime-LoRAs ein. Dies ist die nächste Version vom selben Autor. (WD14-Beschriftung)
- ReV Animated -Ein zuverlässiges und vorhersehbares Modell, das Sie als Rückfall verwenden können (BLIP oder WD14 funktionieren beide)
- AnyLora – Modell, das für das Training von Anime-LoRAs erstellt wurde (WD14-Beschriftung)
Konfigurationsdatei
Download der Konfigurationsdatei (Gehen Sie zu dem Link, klicken Sie dann mit der rechten Maustaste auf die Seite -> Speichern unter), ändern Sie dann die Erweiterung, sodass der Dateiname pastebin.com_raw_ZgbbrE7f.json ist.
Klicken Sie auf das „Configuration File“-Dropdown und dann auf Öffnen.

Wählen Sie die Datei aus, die Sie gerade heruntergeladen haben, und drücken Sie dann Laden.
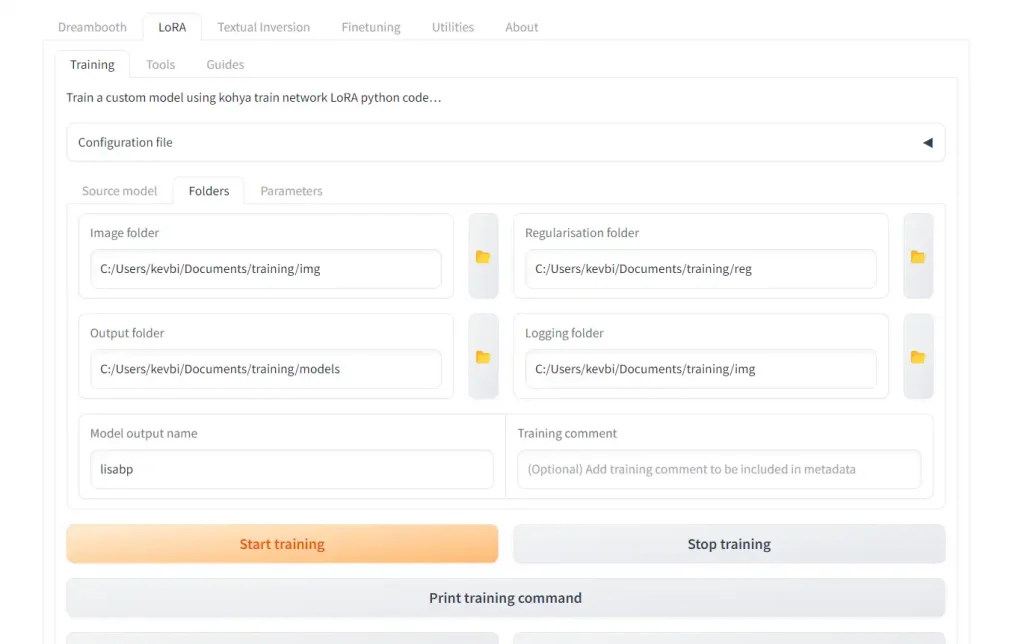
Ordner festlegen
Gehen Sie zur Registerkarte „Folders“ und legen Sie Ihre Ordner fest:
Image folder: Ort desimg-Ordners, den Sie im vorherigen Schritt erstellt haben (NICHT den nummerierten Unterordner darin).Output folder: Ordner, in den Ihre LoRAs nach Abschluss gelegt werden.Regularizationfolder(optional): Ort des reg-Ordners, der einen Unterordner mit Ihren Regularisierungsbildern enthält.Loggingfolder(optional): Ordner, in den Ihre Protokolle ausgegeben werden.Model output name: Name Ihrer ausgegebenen LoRA. Ich nenne die LoRA normalerweise das Triggerwort, gefolgt von einer Versionsnummer wie „_v1“, falls ich mehrere trainiere (meistens dauert es mehrere Versuche, um es richtig zu machen).
Epochen und Schritte
Ich finde, dass Charakter-LoRAs am besten abschneiden, wenn sie zwischen 1500-3000 Schritten trainiert werden.
Es gibt verschiedene Möglichkeiten, dies zu erreichen, aber zuerst lassen Sie uns verstehen, wie Schritte berechnet werden:
Gesamtschritte = (Anzahl der Bilder * Wiederholungen * Epochen * Regularisierungsfaktor) / Batch-Größe
- Anzahl der Bilder ist selbsterklärend, es ist die Anzahl der Trainingsbilder, die Sie zuvor gesammelt und in einen Unterordner gelegt haben.
- Wiederholungen ist die Anzahl der Male, die unser Trainingsalgorithmus über jedes Bild pro Epoche geht. Wir erhalten die Wiederholungen von der Zahl, die wir in der Benennung unseres Trainingsbildordners verwendet haben. Unser Ordnername war
6_lisabp woman, und 6 war die Anzahl der Wiederholungen. - Epochen ist eine Einstellung, die Sie im Untertab
Parametersändern können. Sie zeigt, wie viele vollständige Durchgänge der Lernalgorithmus durch den gesamten Trainingsdatensatz macht. - Regularisierungsfaktor ist entweder 1 oder 2. Wenn Sie keine Regularisierungsbilder verwenden, beträgt dies 1 (nichts passiert). Wenn Sie Regularisierungsbilder verwenden, beträgt dies 2 (Schritte werden verdoppelt).
- Batch-Größe ist eine Einstellung, die Sie im Untertab
Parameters